How to Remove Background Noise in OBS Studio
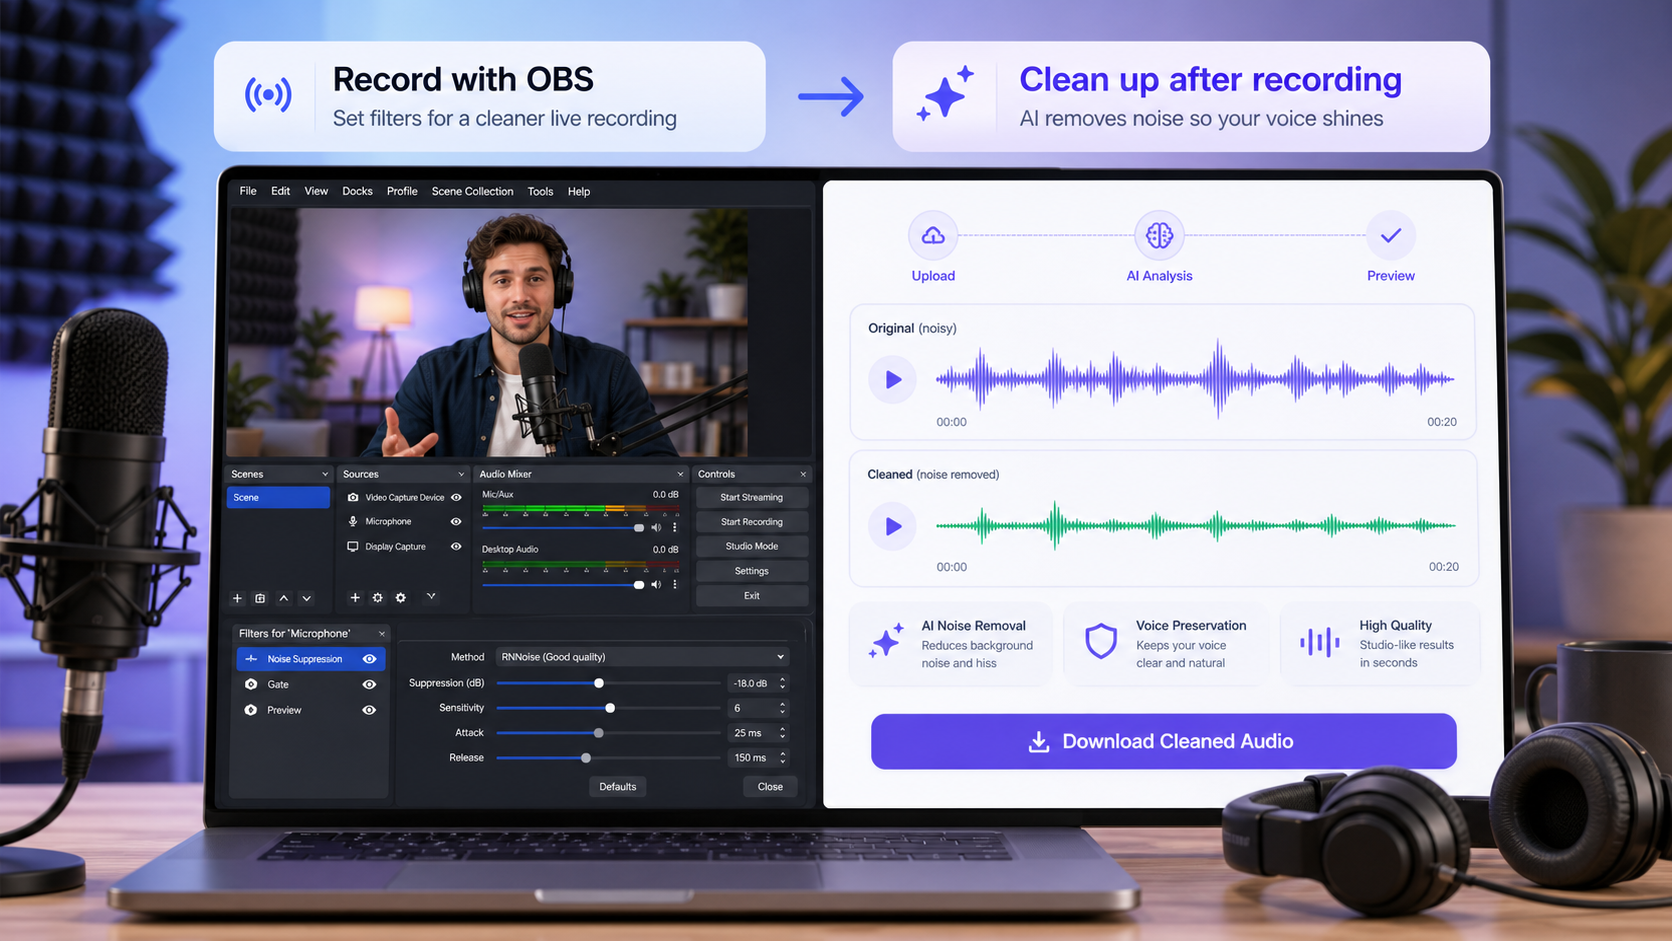
To remove background noise in OBS Studio, add Noise Suppression to your microphone source, choose the suppression method that fits your system, record a short test, then add a gate or expander only if the noise is still distracting between words. Keep the workflow in that order. OBS is strongest when you are preparing a mic before recording or streaming. If the video is already recorded and the noise changes across the file, post-recording cleanup is usually the faster path.
The main mistake is treating OBS as one magic "clean audio" switch. It is a filter chain. You add one filter, test the recording, then decide whether the next filter is actually needed.
This guide follows the order most users should use inside OBS: set the source, add Noise Suppression, choose the method, test the result, add gate/expander only if necessary, then decide whether the recording needs a post-production cleanup workflow such as CleanAudio's video noise remover.
Step 1: Add Noise Suppression to the Right Source
OBS applies filters to individual audio sources. If your microphone is called "Mic/Aux" in the mixer, add the filter there. If your microphone is a separate source in the scene, add the filter to that source instead.
Use this exact path:
- Open OBS Studio.
- In the Audio Mixer, find the microphone source you actually use.
- Click the gear icon beside that source.
- Choose Filters.
- Click + under Audio Filters.
- Select Noise Suppression.
- Name the filter clearly, such as Mic Noise Suppression.
- Record a short local test before adding any other filter.
OBS's Noise Suppression documentation describes the filter as useful for mild background noise or white noise in audio sources, and says it is generally not effective for large amounts of background noise in a loud room [1]. That is the first boundary to keep in mind. If your room is loud enough that the speaker is competing with the background, OBS can reduce distraction, but it should not be expected to rescue the recording alone.
Before changing settings, make the microphone easier to clean:
- Move the mic closer to your mouth.
- Turn the keyboard slightly away from the mic.
- Keep the mic away from the laptop fan or PC exhaust.
- Lower the input gain if the meter is frequently close to clipping.
- Record in the quietest room available.
This is still part of the OBS workflow. A stronger voice signal gives every filter a better starting point.
Step 2: Choose RNNoise, Speex, or NVIDIA Noise Removal
After you add Noise Suppression, OBS asks which method to use. This choice belongs here in the workflow, not as an abstract technical detour, because the right method determines how the first test recording sounds.
OBS currently documents these options:
| Method | How to think about it | Best first use | Watch for |
|---|---|---|---|
| RNNoise | Default method with higher quality and higher CPU use | Normal voice recording or streaming when CPU headroom is available | Voice may sound processed if the source is weak or the room is loud |
| Speex | Configurable suppression method | Lower-resource setups or cases where you want to tune suppression level | Too much suppression can thin the voice |
| NVIDIA Noise Removal | Option available after installing the NVIDIA Broadcast SDK redistributable on supported setups | Systems where that NVIDIA path is already available and tested | Availability depends on hardware/software setup |
Start with RNNoise for most creator, course, and webinar recordings. If OBS performance suffers, or if the voice sounds too processed, test Speex. If NVIDIA Noise Removal is available on your system, test it against RNNoise with the same short recording instead of choosing by label.
Do not tune by watching the meter. Use a repeatable test:
- "This is my normal speaking voice."
- "Now I am typing while talking."
- "Now I pause for five seconds."
- "Now I speak louder, like I would during a live moment."
That clip tells you whether the method preserves your voice, whether keyboard noise still cuts through, and whether the background becomes less distracting without making speech sound artificial.
Step 3: Record a Test Before You Add More Filters
The next step is not adding a gate. It is listening.
Record 20-30 seconds locally in OBS. Play it back through headphones. Check four moments:
| Test moment | What you are checking | Good sign | Warning sign |
|---|---|---|---|
| Silence before speech | Whether background noise drops | Room sounds quieter | Noise still dominates |
| Normal speech | Whether the voice stays natural | Words are clear and stable | Voice sounds watery, dull, or metallic |
| Typing while speaking | Whether transient noise cuts through | Voice remains understandable | Clicks remain sharp under words |
| Loud phrase | Whether the signal clips | No distortion | Harsh crackle or flattened peaks |
If the voice is already cleaner and natural, stop. You do not need a full audio chain because a tutorial said so. Every extra filter adds another chance to damage the voice.
If the background noise is still present only during pauses, continue to the next step. If the noise is present while you speak, a gate will not solve it. You either need better source capture, a different suppression method, or post-recording cleanup.
Step 4: Add a Noise Gate or Expander Only for Pause Noise
Noise Suppression and Noise Gate solve different problems.
Noise Suppression reduces background texture in the audio. A Noise Gate cuts off the microphone when the signal falls below a threshold. OBS's Noise Gate documentation explains that the close threshold should be above the noise volume and the open threshold slightly below the voice input [2].
Use a gate only when the problem happens between words.
Good gate cases:
- Fan noise is audible during pauses.
- Room tone is distracting between sentences.
- The microphone stays open while you are not talking.
- The speaking voice is clearly louder than the background.
Bad gate cases:
- Keyboard clicks happen while you speak.
- The room is loud under every word.
- You speak quietly or trail off often.
- The gate chops word endings.
The simplest tuning logic is this:
- Watch the mic meter while you are silent.
- Set the close threshold above that silent-room level.
- Speak normally.
- Set the open threshold below your normal voice level.
- Record and listen for chopped word endings.
If the gate makes speech feel jumpy, back off. A slightly noisy pause is better than a voice that keeps opening and closing unnaturally.
Step 5: Add Compression and Limiting After Cleanup
Compression is not a noise remover. It reduces dynamic range. That can make your voice more even, but it can also lift quiet background noise if you use it too early.
Use this order for a practical OBS voice chain:
| Order | Filter or action | Job |
|---|---|---|
| 1 | Mic placement and input level | Capture stronger voice before processing |
| 2 | Noise Suppression | Reduce steady background texture |
| 3 | Expander or Noise Gate | Reduce noise between phrases if needed |
| 4 | Compressor | Even out loud and quiet speech |
| 5 | Limiter | Prevent loud peaks from clipping |
| 6 | Local test recording | Confirm the whole chain works before publishing |
If you compress first, the compressor can pull up the fan, room tone, or keyboard bed. If you limit too late after clipping has already happened at the input, the damage is already baked in. Keep input level sane before the chain.
Step 6: Match the Workflow to the Noise Type
At this point, you have the core OBS workflow. The next decision is whether OBS filters are the right tool for your specific noise.
| Noise problem | What it sounds like | First OBS move | If that fails |
|---|---|---|---|
| PC fan or HVAC | Steady layer behind the voice | Noise Suppression | Improve mic placement or use post-recording cleanup |
| Mic hiss | Constant high-frequency texture | Noise Suppression, then lower gain if needed | Avoid over-suppression that dulls speech |
| Keyboard taps | Short clicks during typing | Move mic and keyboard first; try suppression | Post-recording cleanup may be better if clicks happen under speech |
| Room tone between words | Room sound in pauses | Expander or Noise Gate | Loosen thresholds if speech gets chopped |
| Echo/reverb | Hollow room reflections around the voice | Improve room and mic position | Use dedicated echo cleanup after recording |
| Loud room chatter | Other voices in the background | Reduce the source or record elsewhere | Do not expect clean separation of overlapping speech |
| Wind into microphone | Rumble and buffeting | Physical wind protection before capture | Use wind-specific cleanup only if speech remains present |
This is where technical analysis helps the user, but it should not interrupt the how-to flow. A filter that works for fan noise may do very little for echo. A gate that hides silence noise may not touch keyboard clicks under speech. A compressor that makes speech sound fuller can also make leftover noise more obvious.
When OBS Is Enough
OBS is enough when the problem is predictable and you can test before recording.
Good cases:
- A desktop fan under a narration.
- Light HVAC noise in a home office.
- Mild mic hiss.
- Keyboard noise mostly during pauses.
- A live stream where real-time processing matters.
In these cases, OBS should be the first workflow because it prevents noise from reaching the recording. That is better than repairing the file later.
When CleanAudio Is the Better Next Step
CleanAudio becomes more useful after the recording already exists.
That difference matters. OBS is a capture-time control system. CleanAudio is a post-recording cleanup workflow. If you are preparing a livestream, tune OBS. If you already have a noisy video file, upload the file and preview cleanup before rebuilding an audio chain by hand.
Use CleanAudio when:
- The file is already recorded.
- The noise changes across the video.
- You have a tutorial, meeting, vlog, or course recording to clean quickly.
- You do not want to detach audio, tune filters manually, and re-sync the track.
- You need to compare the original and cleaned result before committing.
CleanAudio's workflow is deliberately simpler:
- Upload the recorded video or audio.
- Let the hybrid model analyze the file.
- Preview the cleaned result.
- Download only if the voice is clearer and still natural.
The hybrid model point matters for mixed recordings. One file may contain fan noise in the intro, keyboard taps during a screen capture, and room tone under the outro. A single fixed OBS setting may not be ideal for every section. CleanAudio is more useful when the file needs routing across different noise conditions and the user does not want to build that chain manually.
For recorded video, use CleanAudio's video noise remover. For audio-only recordings, use remove background noise from audio. For hollow room sound, use remove echo from audio.
OBS vs CleanAudio: Which Should You Use?
Use OBS before recording. Use CleanAudio after recording.
| Job | Better first workflow | Why |
|---|---|---|
| Live stream mic setup | OBS | Filters need to run in real time |
| Recording a tutorial tomorrow | OBS | Prevent noise before capture |
| Cleaning a video already recorded | CleanAudio | Lower friction than rebuilding an audio chain |
| Mixed noise across a long file | CleanAudio | Better fit for section-by-section cleanup decisions |
| Detailed broadcast chain | OBS plus manual audio tools | You may need exact control |
| Quick creator cleanup | CleanAudio | Upload, preview, download is faster |
There is no need to make one tool do everything. OBS is excellent for live and capture-time control. CleanAudio is built for recorded-file cleanup.
Common OBS Mistakes
| Mistake | What happens | Better move |
|---|---|---|
| Adding every filter immediately | You cannot tell which filter caused the problem | Add one filter, record, listen, then continue |
| Using a gate for keyboard clicks under speech | Clicks remain while words get chopped | Move the mic first; use post cleanup if needed |
| Compressing before cleanup | Background noise becomes louder | Reduce noise first, then compress |
| Chasing total silence | Voice starts sounding unnatural | Aim for less distraction, not mathematical silence |
| Trusting only the meter | Problems show up only in playback | Record a short test and listen on headphones |
| Treating echo as background noise | Hollow voice remains | Improve the room or use echo-focused cleanup |
The best OBS setup is not the most complicated one. It is the one you can test, repeat, and trust before recording.
Common Questions
Can OBS remove background noise from a microphone?
Yes. OBS includes a Noise Suppression filter for audio sources. OBS describes it as useful for mild background noise or white noise, such as PC fan noise or environmental noise, but not generally effective for large amounts of background noise in a loud room [1].
Should I use RNNoise or Speex in OBS?
Start with RNNoise for most voice recordings if your system has enough CPU headroom. OBS describes RNNoise as higher quality with greater CPU use, while Speex is configurable [1]. If the voice sounds processed or CPU load is an issue, test Speex with the same recording.
Can OBS remove keyboard noise?
Sometimes. OBS can reduce some background texture, and a gate can reduce keyboard noise during pauses. Keyboard clicks that happen while you speak are harder because the click and the voice overlap.
Can OBS remove echo?
Not reliably. Echo and reverb are reflected voice, not just background noise. Improve the room and mic position first. For an already recorded file, use a dedicated echo cleanup workflow.
Is CleanAudio better than OBS for noise removal?
They fit different stages. OBS is better before capture and during live streaming. CleanAudio is better when the recording already exists and you want a preview-first cleanup workflow without manually tuning filters.
Sources and Further Reading
[1] OBS Studio Knowledge Base: Noise Suppression Filter https://obsproject.com/kb/noise-suppression-filter
[2] OBS Studio Knowledge Base: Noise Gate Filter https://obsproject.com/kb/noise-gate-filter
[3] OBS Studio Knowledge Base: Filters Guide https://obsproject.com/kb/filters-guide