How to Remove Background Noise in CapCut
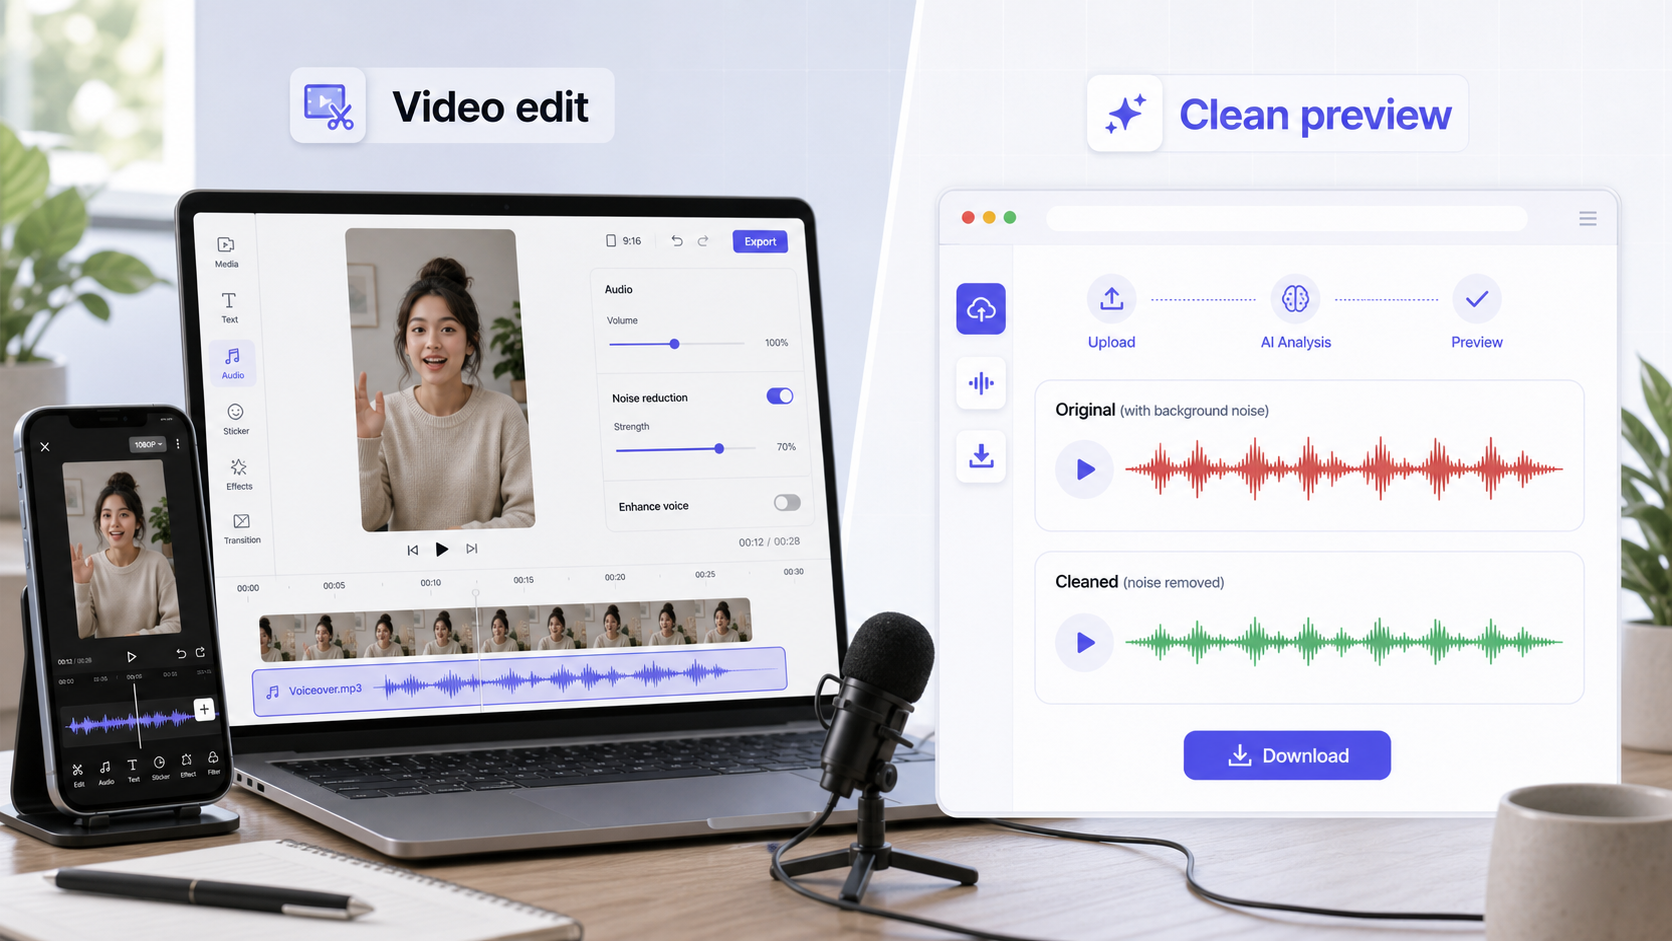
To remove background noise in CapCut, import your video, select the audio or clip, look for the audio cleanup or noise reduction control available in your version, apply it, then preview the result before exporting. CapCut also offers an official online tool page for removing background noise from audio [1]. The important part is listening: a cleaner waveform does not always mean a better voice.
CapCut is useful when you are already editing a short video and want a quick cleanup inside the same creative workflow. If the file mainly needs clearer speech, CleanAudio's video noise remover gives you a more focused path: upload the video, preview the cleaned audio, then download if it sounds better.
For related context, see remove noise from video online free, background noise removal, and noise removal vs noise reduction.
Quick Answer
CapCut can help reduce background noise, especially for creator videos where the voice is still understandable. Use it when you want a quick fix while editing captions, cuts, music, and social formatting.
Use CleanAudio when the audio cleanup is the main job. That is often better for interviews, tutorials, voiceovers, and client clips where you want to preview the cleaned sound before committing it to the edit.
The CapCut Workflow
The exact interface can vary by web, desktop, and mobile version, so do not rely on a single screenshot from an old tutorial. The practical workflow is stable enough, and this is the safest way to approach it:
- Import the video or audio.
- Put the clip on the timeline and play the noisy section once before changing anything.
- Select the clip or audio track that contains the voice.
- Open the audio tools for that selected clip.
- Find the available noise reduction, voice cleanup, or background-noise removal control in your version.
- Apply it lightly first if the interface gives you a strength control. If it is only an on/off control, treat the preview step as the real control.
- Play the clip with the video, captions, and music at normal listening volume.
- Mute the music or lower it temporarily if you need to judge the voice.
- Export only if the cleaned voice sounds clearer and not overprocessed.
CapCut's official tool positioning is built around removing background noise from audio online [1]. That supports the broad workflow, but you should still check the current interface in your own account and device.
For short videos, judge the first three seconds carefully. If the opening line sounds robotic or thin after cleanup, the viewer may leave before the rest of the edit matters. A little background room tone is usually acceptable. A damaged voice is not.
What CapCut Handles Well
CapCut is strongest when cleanup is one small part of a social video workflow. You may be trimming a vlog, adding captions, changing aspect ratio, and lowering background music. In that case, staying inside the editor makes sense.
It is a reasonable first pass for:
| Clip type | Likely result |
|---|---|
| Phone vlog with mild street noise | Often worth trying |
| Voiceover with light room tone | Often worth trying |
| Tutorial with fan noise | Try, then listen for artifacts |
| Outdoor wind hitting the mic | May need dedicated cleanup or a retake |
| Audio with clipped speech | Cleanup may not fix the damage |
If the voice is buried, no editor toggle can reliably invent missing speech.
When CleanAudio Is the Lower-Friction Choice
CapCut is an editor. CleanAudio is a cleanup workflow. That difference matters.
If your question is "how do I make this voice easier to hear?" you may not need to open a full editing environment. CleanAudio lets you upload a video, run AI audio cleanup, preview the cleaned sound, and download the result if it is better. The hybrid model can analyze different segments and apply suitable noise reduction without asking you to choose a manual filter for each section.
This is useful when a short video has mixed noise: a little traffic at the start, room tone in the middle, and handling noise near the end. The article explains the editing choice so you understand the tradeoff. The productized path is simpler when you want the file cleaned, not rebuilt as a full social edit.
A useful way to think about it:
| Dimension | CapCut | CleanAudio |
|---|---|---|
| Simplicity | High. It is convenient when you are already editing a short video. | High. The workflow is upload, AI analysis, preview, download. |
| Professional cleanup focus | Basic to moderate. Useful for quick creator edits, but the audio controls are not the whole product. | Higher for complex voice cleanup. The product is focused on analyzing noisy audio and previewing the cleaned result. |
| Best use | Captions, cuts, music, social format, quick export. | Mixed noise, voice-first files, interviews, tutorials, and clips where audio clarity matters. |
| Weak point | Can feel too simple when noise changes across the clip. | Does not replace creative editing, captions, transitions, or social formatting. |
So the comparison is not "CapCut is easy and CleanAudio is advanced." The stronger split is: both are easy, but CleanAudio is more specialized for serious audio cleanup, especially when the noise is not one simple background layer.
Avoid Overprocessing
A common mistake is treating noise reduction as a quality slider. More is not always better. If the voice starts to sound hollow, metallic, or underwater, the cleanup is too aggressive for that recording.
Keep the original file. Compare before and after with headphones. If the cleaned version loses consonants, breath, or natural tone, use a lighter workflow or accept a small amount of background noise.
For echo-heavy recordings, use remove echo from audio. For wind-heavy outdoor video, use remove wind noise from video. A general noise tool can help, but different problems behave differently.
CapCut vs CleanAudio
Use CapCut when the edit is the center of the job. Use CleanAudio when the audio cleanup is the center of the job.
| Job | Better first workflow |
|---|---|
| Add captions, cuts, music, and export a social clip | CapCut |
| Clean one video file before posting | CleanAudio |
| Batch-check voice clarity before editing | CleanAudio |
| Make creative video edits after cleanup | CapCut |
| Fix severe clipping or missing words | Retake if possible |
That is the practical split. CapCut is convenient. CleanAudio is focused.
A common workflow is to use both: clean the source video with CleanAudio first, then bring the cleaner file into CapCut for captions, trimming, music, and export. That keeps the audio decision separate from the creative edit, which is often easier than trying to judge voice quality after music, effects, and compression are already in the timeline.
A Practical CleanAudio to CapCut Workflow
If the clip is important, separate the cleanup decision from the social edit.
- Start with the original video file, not a compressed repost or screen recording.
- Upload it to CleanAudio and run the audio cleanup preview.
- Listen to the first sentence, the noisiest sentence, and a quiet pause. Those three moments usually reveal whether the cleanup is helping.
- Download the cleaned version only if the voice is easier to understand and still sounds natural.
- Import the cleaned file into CapCut.
- Add captions, trims, music, overlays, and platform formatting after the voice is already acceptable.
- Before export, play the final video once with music enabled and once with music muted. If the voice only sounds clear when the music is muted, lower the music rather than adding more noise reduction.
This workflow is slower than pressing one button inside CapCut, but it gives you a cleaner decision point. You judge the voice first, then build the edit around it.
FAQ
Can CapCut remove background noise from video?
CapCut offers noise reduction and audio cleanup workflows, including an official online background-noise removal tool [1]. Results depend on the recording and the version of CapCut you use.
Is CapCut enough for podcast or interview audio?
Sometimes. If the noise is light and the edit is simple, it may be enough. If the voice track matters more than the video edit, use a focused audio cleanup workflow and preview the result carefully.
Should I use CapCut or CleanAudio first?
Use CleanAudio first when the file needs cleaner speech before editing. Use CapCut first when you are already building the final short video and the noise is only a minor issue.
Why does noise reduction make my voice sound strange?
Aggressive cleanup can remove parts of the voice along with the noise. That is why you should preview the result and avoid pushing a setting until the background becomes completely silent.
References Used for Fact Check
[1] CapCut: Remove Audio Background Noise
URL: https://www.capcut.com/tools/remove-background-noise-from-audio