How to Remove Background Noise in Premiere Pro
To remove background noise in Premiere Pro, select the dialogue clip, open the Essential Sound panel, assign the clip as Dialogue, then use the Repair controls such as Reduce Noise. For more control, open the applied DeNoise effect in Effect Controls and adjust the amount or processing focus. That workflow works best when the voice is clear and the noise is steady enough to reduce without damaging the dialogue.
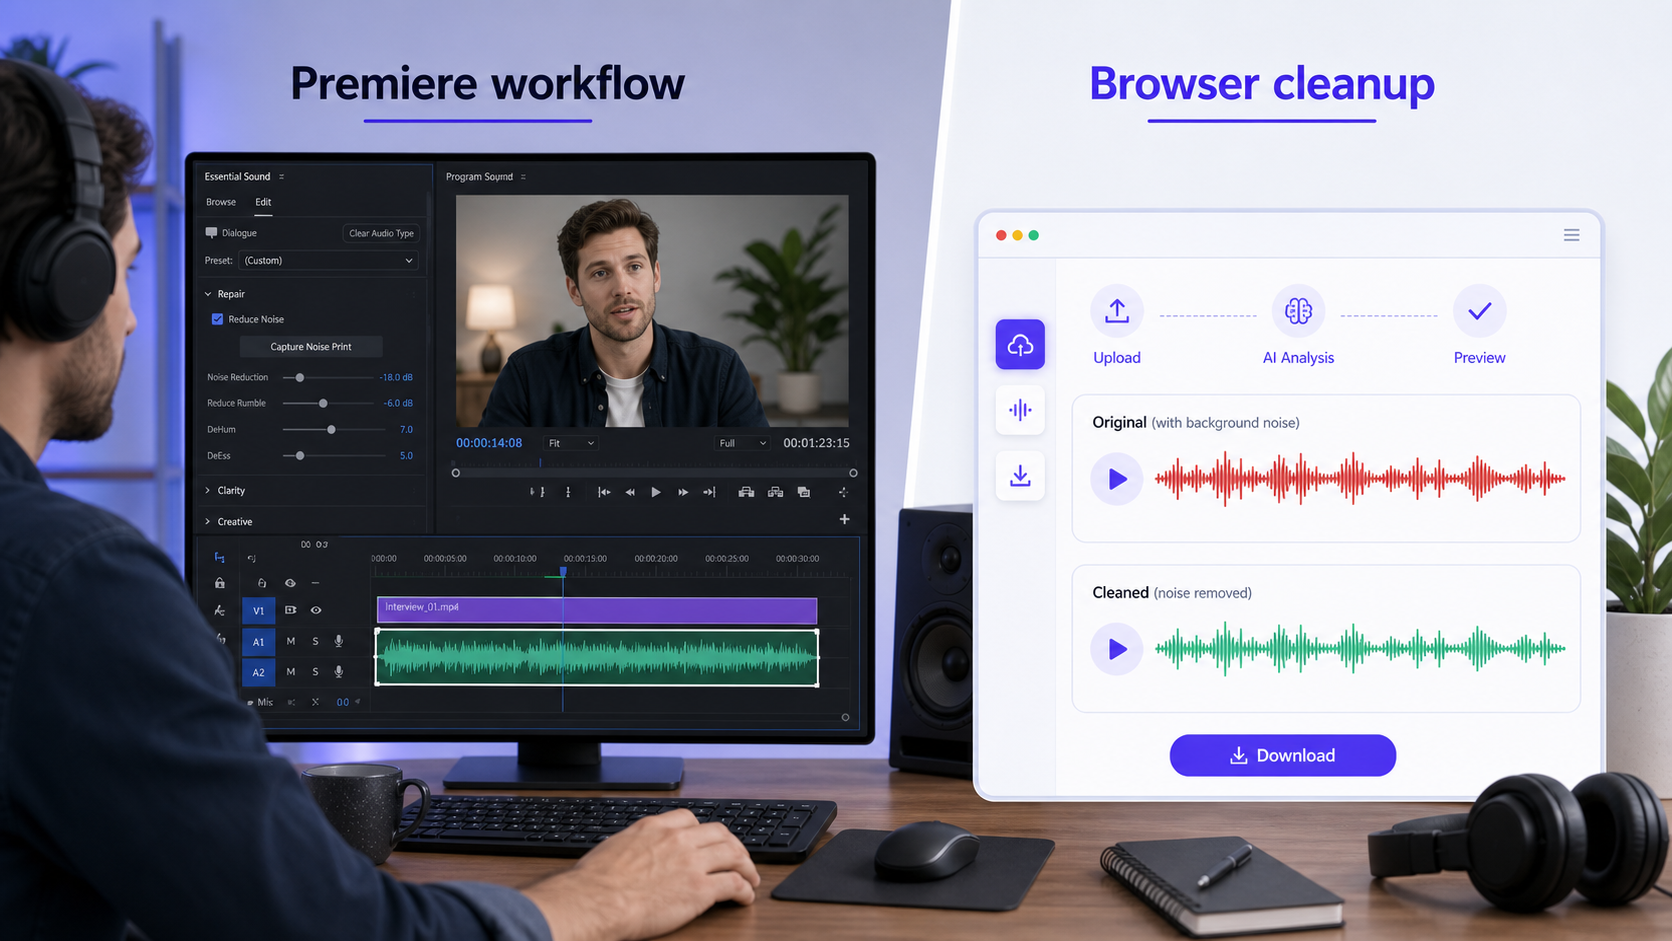
Premiere Pro is a good choice when the audio is already inside an edit and you want to fix it without leaving the timeline. If you only need to clean the sound from a video file, CleanAudio's video noise remover is usually the lower-friction path: upload the video, let the AI analyze the audio, preview the cleaned version, then download if the result sounds better.
For broader context, read background noise removal and noise removal vs noise reduction.
Quick Answer
Premiere Pro can reduce background noise from dialogue with the Essential Sound panel and the DeNoise effect. Adobe's own tutorial notes that enabling Reduce Noise in Essential Sound applies DeNoise to the selected clip, and advanced settings are available from Effect Controls [1].
Use Premiere when you are already editing the video and need timeline control. Use CleanAudio when the job is simply to make voice audio cleaner before publishing or before bringing the file into another editor.
Method 1: Use Essential Sound for a Fast Dialogue Cleanup
The fastest Premiere workflow starts in the Essential Sound panel. Use it when the clip is already in your timeline and the noise is not severe enough to require a full audio repair session.
- Open the sequence and select the audio clip that contains the noisy dialogue. If the video and audio are linked, click the clip once and make sure the audio portion is selected.
- Open Essential Sound. If you do not see it, use the Window menu and enable Essential Sound.
- Click Dialogue so Premiere treats the clip as spoken audio.
- Open the Repair section.
- Enable Reduce Noise. Adobe documents that this applies the DeNoise effect to the selected clip [1].
- Start with a light amount, then play the clip from a sentence before the noisy section into a sentence after it.
- Listen for consonants, breath, and room tone. If the voice starts to sound thin, dull, metallic, or watery, back off.
The useful trick is to monitor the voice, not the background. Many editors push noise reduction until the room becomes quiet, then notice later that the speaker sounds processed. A low, steady noise floor is often less damaging than a voice that no longer sounds human.
This method is useful for creator footage where the spoken voice is present but the background distracts: an air conditioner under a talking-head video, a laptop fan during a tutorial, or mild street noise in an interview.
Method 2: Open DeNoise for More Control
Essential Sound is a simplified front door. Premiere also lets you access DeNoise settings in Effect Controls. Adobe documents that you can open advanced DeNoise controls, set processing focus, adjust intensity, manage gain, and save presets [1].
Use the advanced controls when a simple Reduce Noise adjustment does not behave well.
- Select the processed clip.
- Open Effect Controls.
- Find the DeNoise effect that was applied through Essential Sound, or add DeNoise directly if you are building the chain manually.
- Open the effect settings.
- Adjust the amount in small moves. Do not jump straight to an aggressive setting.
- If the noise has a clear frequency character, use the processing focus to aim the reduction more carefully. Low rumble, broadband hiss, and high-frequency whine should not always receive the same treatment.
- Match the output level before judging the result. Louder often sounds better even when it is not cleaner.
- Save a preset only after testing it on more than one clip from the same shoot.
Do not keep adding effects until the background disappears. That usually trades one problem for another: less noise, but more digital artifacts. If the clip needs several repair passes, pause and name the problem first. It may be noise, but it may also be reverb, clipping, wind, or a bad microphone position.
Professional vs Simple: Premiere Pro and CleanAudio
Premiere Pro and CleanAudio are not separated by "professional vs amateur." The better split is professional editing control vs professional cleanup with less setup.
| Dimension | Premiere Pro | CleanAudio |
|---|---|---|
| Professional depth | High. Timeline editing, effects, levels, clip context, export control. | High for creator-facing noise cleanup. Focused on analyzing and cleaning spoken audio without a full editing interface. |
| Simplicity | Medium. Essential Sound is simple, but advanced control still requires effect judgment. | High. Upload, AI analysis, preview, download. |
| Best use | You are already editing the video and need cleanup inside the timeline. | You need the audio in a video file to sound clearer without building an effect chain. |
| Weak point | Easy to overprocess if you chase silence. | Not a full video editor and not a repair tool for badly damaged capture. |
So the comparison is not "Premiere is professional, CleanAudio is simple." The stronger framing is: Premiere is professional and complex; CleanAudio is professional enough for creator noise cleanup and much simpler to operate.
What Premiere Handles Well
Premiere is strong when the noise is part of a normal editing job. You can hear the clip in context, compare it against music and B-roll, and adjust the result without exporting intermediate files.
It is a good fit for:
| Recording problem | Better first workflow |
|---|---|
| Mild fan noise under dialogue | Premiere Reduce Noise or CleanAudio |
| Room tone in a talking-head edit | Premiere or CleanAudio |
| Noisy clip already cut into a timeline | Premiere |
| One-off video file that only needs cleaner speech | CleanAudio |
| Severe wind or clipped microphone | Try cleanup, but expect limits |
The real decision is not whether Premiere is powerful. It is whether you need an editor or a cleanup workflow.
When CleanAudio Is Faster
If the file is voice-first and you do not need timeline edits, CleanAudio removes setup friction. Upload the video, preview the cleaned audio, and download the result if the voice is clearer. The hybrid model can analyze different parts of the recording and apply suitable noise reduction without asking you to choose a manual effect chain.
That matters when the footage has mixed noise. One clip may contain fan hum at the start, keyboard taps in the middle, and room tone throughout. A single Premiere slider may help, but it still asks you to judge the treatment manually.
The practical workflow is:
- Upload the original video.
- Let CleanAudio analyze the audio track.
- Preview the cleaned result before download.
- Compare the voice against the original, especially on consonants and pauses.
- Use the cleaned file when the voice is clearer and still natural.
CleanAudio is not a promise of perfect restoration. If the microphone clipped, if another speaker covers the voice, or if wind fully buries the words, the recording may already be damaged. Preview before replacing the original.
Common Mistakes in Premiere Pro Noise Reduction
Do not push Reduce Noise until the background is gone. Silence can sound unnatural, and speech artifacts are often more distracting than a low, steady noise floor.
Do not treat reverb as the same problem as noise. Room echo is reflected voice energy, not just background sound. If echo is the main issue, use a dedicated workflow such as remove echo from audio rather than only broad noise reduction.
Do not process every clip with the same setting. A close mic, a camera mic, and a lav mic can need different treatment even inside the same project.
FAQ
Can Premiere Pro remove all background noise?
No. Premiere Pro can reduce many common background noises, especially when the voice is still clear. It cannot reliably rebuild clipped speech or recover words that are fully covered by another sound.
Where is noise reduction in Premiere Pro?
The common path is the Essential Sound panel. Select a clip, assign it as Dialogue, and use the Repair controls. Adobe also documents advanced DeNoise settings in Effect Controls [1].
Is CleanAudio better than Premiere Pro?
It depends on the job. Premiere Pro is better when you need timeline editing and manual control. CleanAudio is better when you want a focused browser workflow for video audio cleanup.
Should I remove noise before or after editing?
If the video is already cut, cleaning inside Premiere may be easier. If you are preparing a source file before editing or publishing, cleaning first with CleanAudio can reduce friction.
References Used for Fact Check
[1] Adobe HelpX: Advanced noise and reverberation reduction in Premiere Pro
URL: https://helpx.adobe.com/ph_fil/premiere-pro/how-to/advanced-noise-reverberation-reduction.html
[2] Adobe: Remove Background Noise from Video with Premiere Pro
URL: https://www.adobe.com/products/premiere/remove-background-noise-from-video.html