How to Remove Hiss from Audio Without Hurting Voice Quality
To remove hiss from audio, first confirm that the noise is actually steady hiss and not hum, whine, room echo, or traffic. Then use the lightest tool that matches the problem: a noise-profile reduction for steady broadband hiss, a notch filter for a narrow tone, or a gate only after the main hiss is already under control. The goal is not perfect silence. The goal is a voice that stays natural enough to trust.
That distinction matters because hiss is one of the easiest noise types to overprocess. Audacity's documentation is clear that noise reduction works best on constant noise and that aggressive settings can damage the sound you want to keep [1][2]. Adobe's restoration guidance makes the same point in a more general way: hiss is a restoration target, but stronger reduction always trades against signal quality [3].
If you want a faster review path before opening a full editor, CleanAudio's audio cleanup workflow is useful when the voice is clear but a steady layer of hiss makes the file feel cheap. For context on related problems, see noise removal vs noise reduction, types of background noise in recordings, and how to remove static from audio online.
Quick Diagnosis: Is It Really Hiss?
Hiss is usually a steady, broadband noise sitting behind the voice. It often comes from microphone self-noise, noisy preamps, boosted gain, or older analog material. It tends to feel like a constant layer rather than a repeating pulse.
That is different from:
- Hum, which is often tied to power frequency and harmonics.
- Whine, which is usually a narrower electronic tone.
- Clicks or pops, which are short events.
- Traffic or crowd noise, which changes over time.
This matters because a constant noise can often be profiled and reduced. A changing noise often cannot be cleaned the same way without obvious damage. Audacity's manual explicitly warns that noise reduction is not suited to irregular noise like traffic or audience sound [2].
Why "Just Denoise It Harder" Usually Fails
The common SERP answer is to run a denoiser until the background disappears. That works only when the hiss is mild and the voice has plenty of separation from the noise floor.
Once the denoiser starts grabbing breath detail, consonants, or room texture that helps the voice sound real, the result turns thin, metallic, or glassy. Audacity's support docs and manual both warn about artifacts when settings are pushed too far or when the noise profile is not representative [1][2].
A better rule is this: stop when the hiss stops distracting the listener. Do not keep pushing until the background becomes mathematically quiet.
A Practical Workflow for Hiss Removal
If you use a manual cleanup workflow, treat hiss removal as a controlled test rather than a single button press. The point of the steps below is to make one small decision at a time: identify the hiss, teach the tool the right target, reduce lightly, then stop before the voice loses detail.
- Listen to the file before touching any controls. Find ten to twenty seconds where the hiss is obvious, then find a short gap that contains only the hiss.
- Decide whether the hiss is the main problem. If the recording also has hum, clipping, or room echo, handle those separately instead of expecting one tool to fix everything.
- Capture a noise profile from the hiss-only section if your editor supports it. Audacity and Adobe both treat this as the core workflow for constant noise [1][2][3].
- Apply conservative reduction first. Preview the voice, not just the silent gaps.
- If the hiss is still there but acceptable, stop. If it is still too obvious, try a second light pass instead of one aggressive pass.
- Use a gate only after the main hiss is lower. Audacity specifically recommends gating after noise reduction because it lets you stay less aggressive with the main reduction stage [1].
- Recheck the first sentence, the brightest consonants, and a quiet tail at the end of a phrase. Those moments reveal damage fastest.
This is the workflow most people skip. They listen only to the silence between words, conclude the file is cleaner, and miss the fact that the voice got worse.
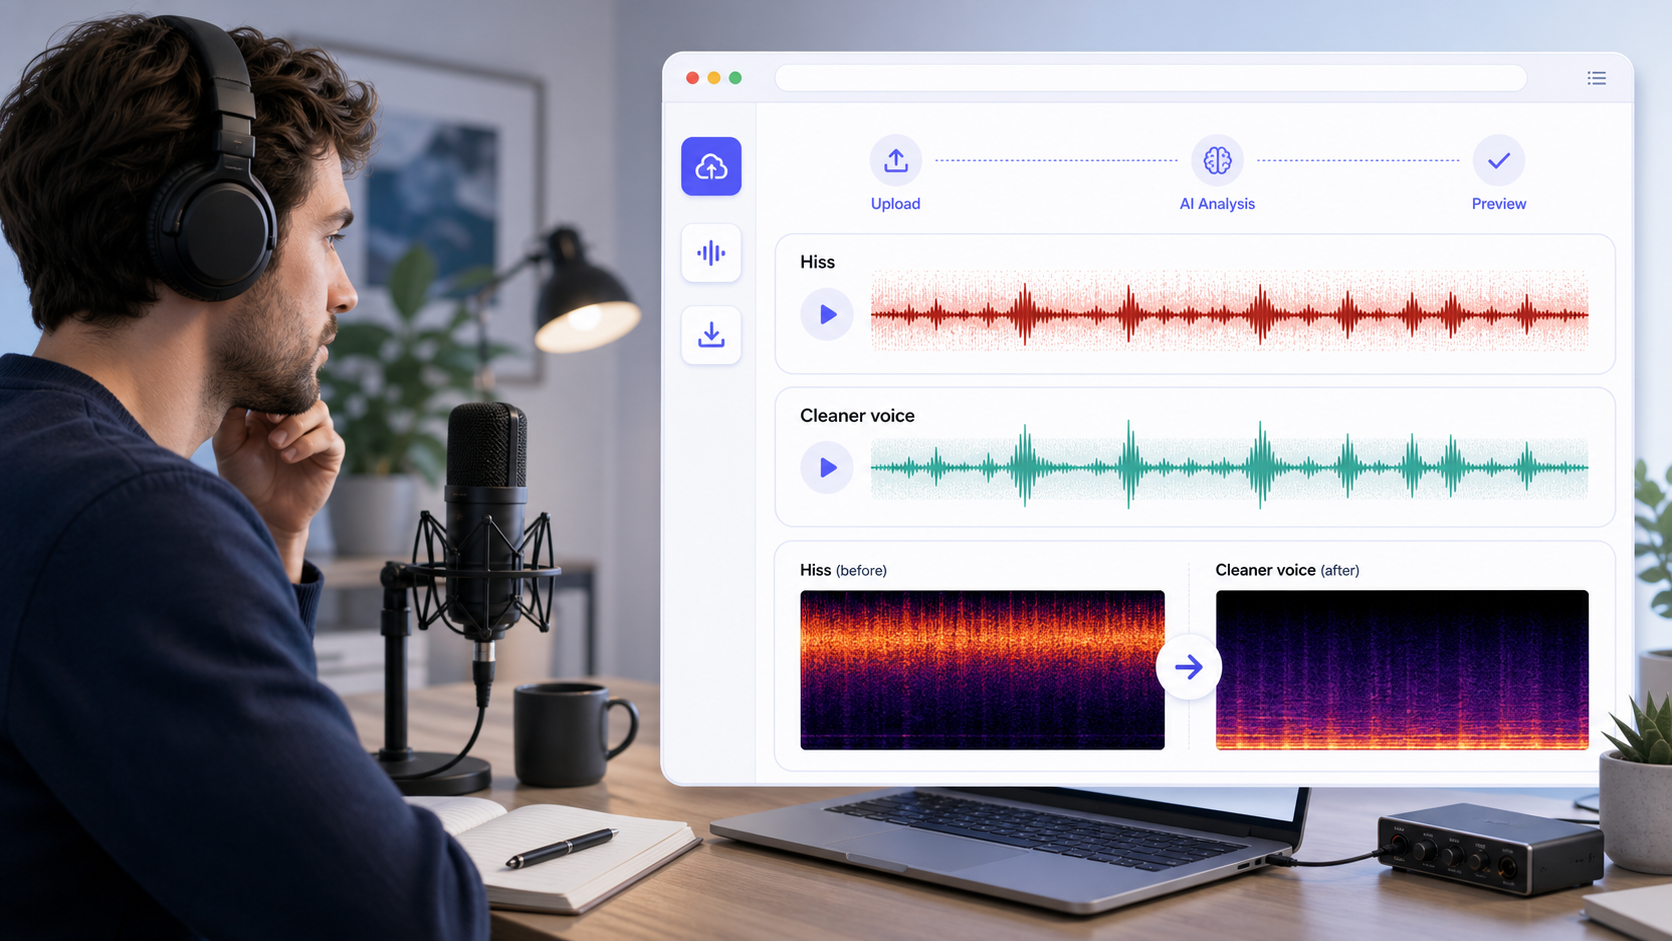
If you use CleanAudio instead, keep the same review habit even though the workflow is simpler. Upload the file, preview the cleaned version, and judge the voice in active speech rather than only in pauses. A productized workflow removes setup friction; it does not remove the need to listen.
Which Tool Fits Which Kind of Hiss?
Use a noise-profile reduction when the hiss is steady from start to finish. That is the clearest match for the official Audacity and Adobe guidance [1][2][3].
Use a notch filter when the problem is not broad hiss but a narrow tone or whistle. Audacity's docs separate those cases for a reason [1][2]. If you treat a narrow tone like broadband hiss, you usually do more damage than necessary.
Use a gentle high-cut only when the hiss lives mostly in the extreme top end and the recording can afford a little softness. This is a judgment move, not a universal fix.
Use a retake when the speech is only slightly louder than the hiss, or when the noise changes as the speaker moves. Audacity's manual is direct about the limits here: satisfactory removal may be impossible when the voice is not much louder than the noise [2].
When CleanAudio Is the Faster Option
If your real question is not which plugin to use but whether the file is salvageable, a productized cleanup preview is often faster than building a full manual chain.
CleanAudio is useful when:
- The file is voice-first.
- The hiss is steady enough that you want a quick before and after judgment.
- You need to hear whether the voice stays natural before you invest more editing time.
- The recording also has a small amount of mixed background noise, not only hiss.
The right expectation is still limited. If the mic gain was too high, the voice is thin already, or the speaker sat far from the mic, no cleanup tool should be sold as perfect restoration. The practical workflow is simpler: upload, run cleanup, preview carefully, and keep the original if the cleaned version sounds less believable.
Common Mistakes
- Capturing the wrong noise profile. If the noise-only sample includes breath or consonants, the tool learns the wrong target [1][2].
- Treating hiss, hum, and whine as the same problem.
- Using one heavy pass instead of two light evaluations.
- Judging quality only in silent gaps instead of inside spoken words.
- Gating first, which can make the file sound abrupt and still leave hiss under the words [1].
- Chasing complete silence even after the voice starts sounding brittle.
What Usually Improves Future Recordings More Than Cleanup
If hiss keeps coming back, the permanent fix is often upstream:
- Move the speaker closer to the mic.
- Lower the amount of make-up gain you need later.
- Check whether the microphone or interface is the noisy part of the chain.
- Record a room sample so you can judge what the raw noise floor really is.
- Avoid stacking unnecessary processing before the main cleanup.
These steps are not glamorous, but they usually improve the next recording more than another round of post-processing.
FAQ
Can hiss be removed completely from audio?
Sometimes, but that is not the right target. The more useful target is making the hiss stop distracting the listener while keeping the voice intact.
Should I use a gate to remove hiss?
Usually not as the first move. A gate can help after the main hiss is reduced, especially in pauses, but it does not remove hiss sitting under active speech [1].
Why does my voice sound metallic after hiss reduction?
The reduction is probably too strong, the noise profile was poor, or the voice and hiss overlap too much in the same frequency areas [1][2].
Is hiss easier to remove than traffic or crowd noise?
Usually yes. Official Audacity guidance treats steady noise as a better candidate for noise reduction than irregular background noise [2].
References Used for Fact Check
[1] Audacity Support: Noise reduction & removal
URL: https://support.audacityteam.org/repairing-audio/noise-reduction-removal
[2] Audacity Manual: Noise Reduction
URL: https://manual.audacityteam.org/man/noise_reduction.html
[3] Adobe Audition Help: Reduce noise and restore audio
URL: https://helpx.adobe.com/audition/desktop/effects-reference/noise-reduction-restoration-effects.html