How to Remove Background Noise in Filmora
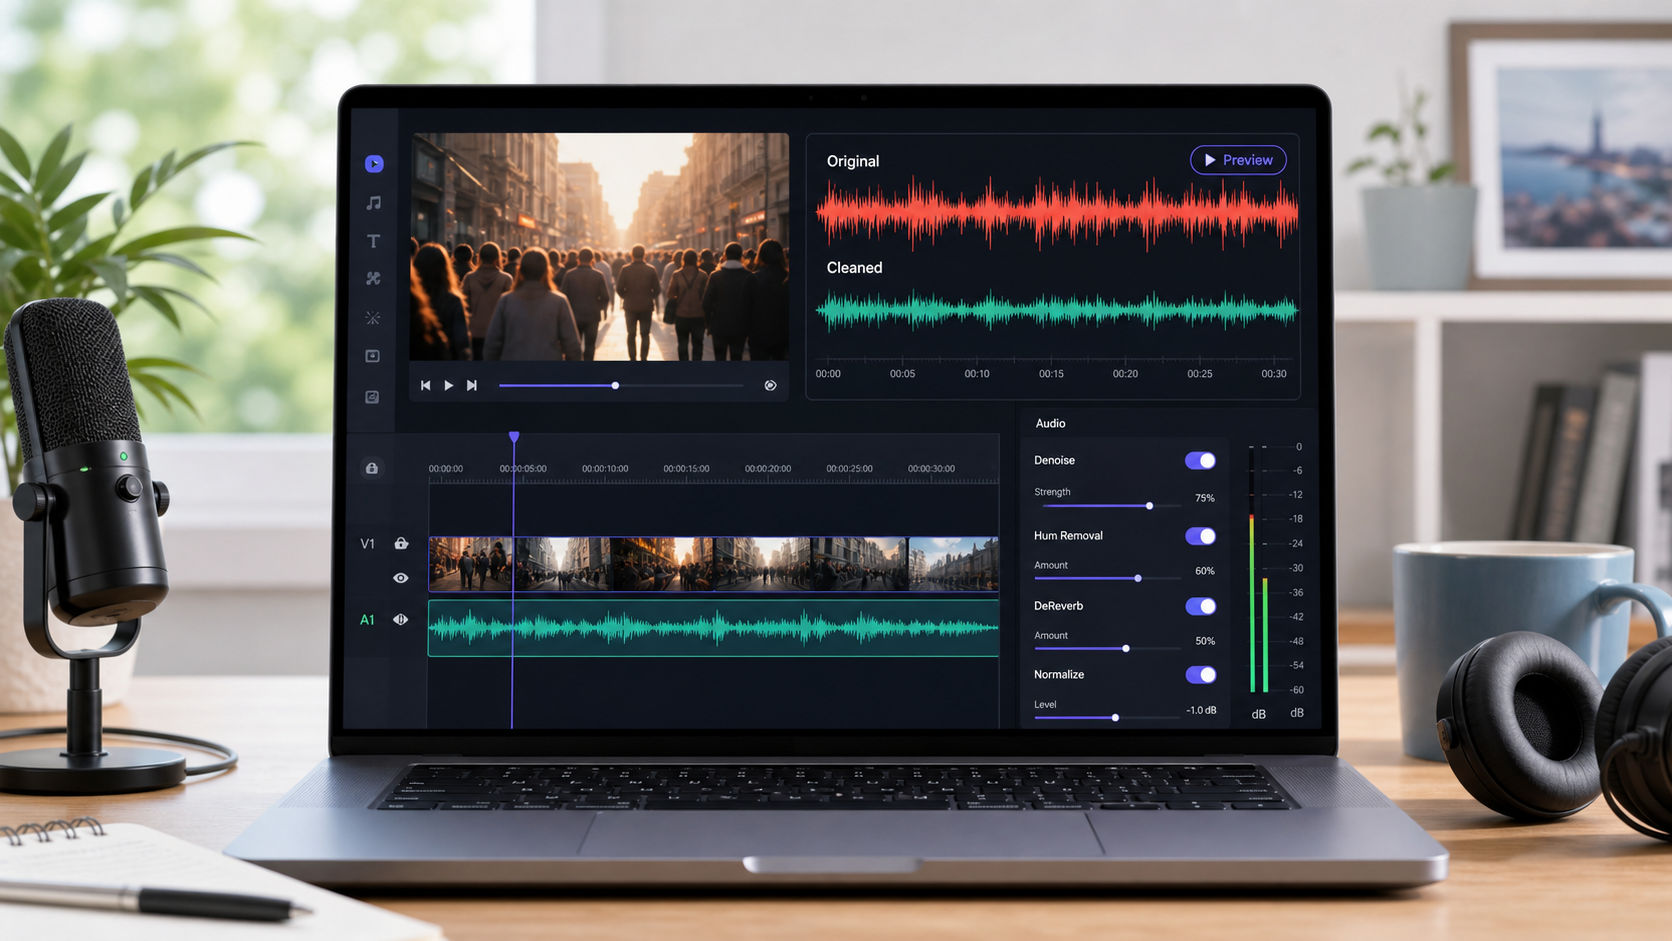
To remove background noise in Filmora, use Filmora's audio denoise or AI Audio Denoise controls on the clip, preview the noisiest spoken section, and export only if the voice becomes easier to understand without turning thin or robotic. Wondershare describes Filmora's AI Audio Denoise as a feature for reducing background noise from audio, including dialogue, narration, voiceovers, podcasts, and video refinement [2].
That makes Filmora useful when you are already editing the video. The main mistake is treating denoise as the final checkbox before export. If the recording is risky, clean and preview the audio before you spend time on cuts, captions, color, and motion graphics. Use CleanAudio's video noise remover first when the real question is whether the noisy file can become usable.
Filmora Workflow
Use this workflow when the clip is already in Filmora and the noise is light or moderate. The exact labels can move between Filmora versions, so use the official interface idea rather than memorizing one button position.
- Import the video or audio file into Filmora.
- Drag the clip onto the timeline.
- Select the timeline clip that contains the noisy audio.
- Open the audio adjustment panel for that clip.
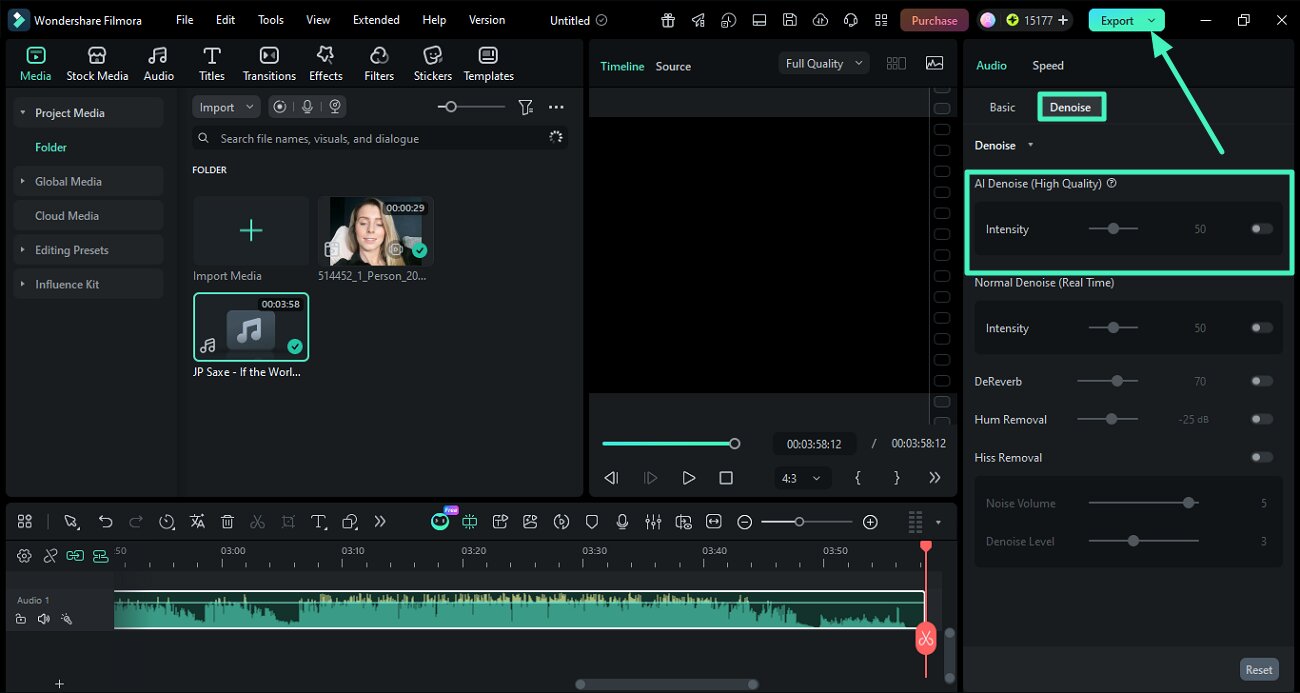
- Find the Denoise controls. Filmora's official Windows guide shows a Denoise panel with options such as Normal Denoise, DeReverb, Hum Removal, Hiss Removal, and Wind Removal [1].
- If the problem is a steady room bed, fan, or general background layer, start with Normal Denoise on a low or medium setting.
- If the problem is room reflection, try DeReverb lightly instead of pushing broad denoise harder.
- If the problem is hum or hiss, use the more specific hum or hiss control if available.
- Play the worst spoken section. Do not judge only from the cleanest part of the clip.
- If words are clearer and the voice still sounds natural, keep the setting.
- If the voice becomes dull, hollow, watery, or gated, reduce the setting or try a different cleanup path.
- Export a short test before rendering the full video.
- Keep the original file until the final version has passed review.
The useful test is not "did the background become quieter?" It is "can a viewer understand the speaker with less effort?" A quieter file can still be worse if the voice loses brightness, timing, or natural texture.
For a real edit, make one change at a time. If you enable denoise, preview it before adding more audio processing. If you also use DeReverb, preview again. When several controls change at once, it becomes hard to know which control improved the file and which control damaged the voice.
If you are comparing editor-based cleanup paths, the closest related guides are remove background noise in Premiere Pro, remove background noise in CapCut, and remove noise from video online free.
What Filmora Is Good For
Filmora is strongest when audio cleanup is one part of a broader creator edit: cutting clips, adding captions, arranging b-roll, adding transitions, and exporting a finished video. It is not only an audio repair environment, and that distinction matters.
| Job | Filmora fit | What to check |
|---|---|---|
| Talking-head video with light fan noise | Good | Does the voice stay natural? |
| Tutorial with steady room noise | Good | Do quiet words remain clear? |
| Outdoor video with wind bursts | Mixed | Wind may need a dedicated pass |
| Interview in a reflective room | Mixed | Echo may remain attached to speech |
| Clip with traffic and chatter | Mixed | Preview the worst phrase |
| Clipped or overloaded audio | Poor | Retake if possible |
Filmora can be a good place to finish the edit after the audio is acceptable. It is less efficient when you need to diagnose the audio before editing, compare cleanup approaches, or batch-check several noisy files.
A Better Review Pass
Before exporting, review the audio in three places: the loudest noise moment, the quietest spoken sentence, and the first transition after a cut. These checks catch different problems. The loudest noise moment tells you whether the denoise setting is strong enough. The quiet sentence tells you whether the setting is cutting into speech detail. The transition check tells you whether the processed audio feels consistent across the edit.
If the voice sounds clearer but slightly processed, do not immediately increase or decrease the setting. Compare against the original. Sometimes the cleaned version is objectively easier to understand even if it sounds less raw. Sometimes the raw version is noisier but more natural. The better export is the one a viewer can listen to longer without effort.
Noise Types to Check Before Export
Noise type matters. A steady fan is easier to suppress than cafe chatter. A low hum is not the same problem as echo. Wind hitting a phone microphone can create bursts that are harder than a stable background layer.
Audacity's manual gives a useful general warning for any noise reduction workflow: stronger reduction can make noise quieter while damaging the remaining audio, and variable or loud noise can create distorted results [3]. That principle applies whether the tool is manual, AI-assisted, or built into a video editor.
| Noise type | Try Filmora first? | Better path if it struggles |
|---|---|---|
| Light fan or room bed | Yes | Keep the setting moderate |
| Hum or electrical buzz | Yes if steady | Use a specific hum workflow if it dominates |
| Wind bursts | Mixed | Use a wind-focused cleanup workflow |
| Room echo | Limited | Use remove echo from audio if the room sounds hollow |
| Cafe chatter | Mixed | Use preview-first AI cleanup and judge the worst phrase |
| Clipping | No reliable software fix | Retake or replace the line |
When to Clean Before Filmora
Clean before editing when the audio quality will decide whether the video is usable. This is common with phone footage, webinars, interviews, screen recordings, and social clips recorded in public spaces. The broader decision is covered in video audio cleanup workflow.
A practical CleanAudio-first workflow looks like this:
- Upload the raw video to CleanAudio.
- Let the hybrid model analyze the audio track.
- Preview the cleaned result before downloading.
- Download only if the voice sounds clearer and still natural.
- Bring the cleaned file into Filmora for editing, captions, graphics, and export.
This order keeps the decision honest. If the cleaned audio still fails, you know before you build the final video around it. If it passes, Filmora becomes the finishing tool instead of the place where you are trying to rescue the entire recording.
Filmora vs CleanAudio
| Need | Filmora fit | CleanAudio fit |
|---|---|---|
| Timeline editing | Strong | Not the main job |
| Captions, layout, effects, export | Strong | Secondary |
| Dedicated audio cleanup before editing | Possible | Strong |
| Mixed noise diagnosis | Limited | Stronger fit |
| Previewing cleanup before committing | Possible | Core workflow |
| Batch deciding whether files are usable | Limited | Better fit |
The best workflow is often both tools, not one tool forever. Clean the risky file first, then edit the video in Filmora.
Common Mistakes
| Mistake | What happens | Better move |
|---|---|---|
| Using the strongest denoise setting immediately | Voice can become dull or processed | Start moderate and preview |
| Judging the cleanest sentence only | The export may fail in the noisy section | Check the worst phrase |
| Treating echo as ordinary background noise | The room may still sound hollow | Use an echo-specific workflow |
| Exporting without headphones | Artifacts may be hidden by laptop speakers | Review with headphones before export |
| Deleting the original file | You lose the comparison point | Keep the raw file until final approval |
When Filmora Is Still the Right Place to Work
Stay in Filmora when the edit itself is the main task. For example, if you are cutting a talking-head clip, adding captions, trimming pauses, and the background noise is light, Filmora's built-in denoise path is efficient. You do not need to leave the editor for every small noise issue.
Move the audio decision outside Filmora when the recording is uncertain. If the speaker was recorded in a cafe, near traffic, in a reflective room, or with a phone mic outdoors, clean and preview before the edit. This saves time because the audio pass decides whether the video is worth finishing.
FAQ
Can Filmora remove background noise?
Filmora includes audio denoise tools, and Wondershare describes AI Audio Denoise as a way to reduce background noise from audio [2]. The result still needs a listening check because heavy noise reduction can damage voice quality.
Should I clean audio before or inside Filmora?
Use Filmora when the edit is the main job and the noise is light. Use CleanAudio first when the recording itself is risky and you need to know whether the audio can be made usable before editing.
Can Filmora fix wind, echo, or clipped audio?
It may help with some noise, but wind bursts, echo, and clipping are harder than a steady background layer. Preview the worst section and use a dedicated workflow when needed.
Sources and Further Reading
- Wondershare Filmora guide - AI Audio Denoise for Windows: https://filmora.wondershare.com/guide/ai-audio-denoise-for-windows.html
- Wondershare Filmora - AI Audio Denoise: https://filmora.wondershare.com/ai-audio-denoise.html
- Audacity Manual - Noise Reduction: https://manual.audacityteam.org/man/noise_reduction.html
- Adobe Audition - Noise reduction and restoration effects: https://helpx.adobe.com/audition/desktop/effects-reference/noise-reduction-restoration-effects.html