Video Audio Cleanup Workflow for Vlogs, Interviews, and Tutorials
Search this topic and many guides jump straight to a denoise slider. That is usually the wrong first move. A usable video audio cleanup workflow starts by asking what the microphone actually captured: steady room noise, low rumble, light reverb, distance from the speaker, or short interruptions that need local repair. Vlogs, interviews, and tutorials fail in different ways, so one preset rarely survives all three.
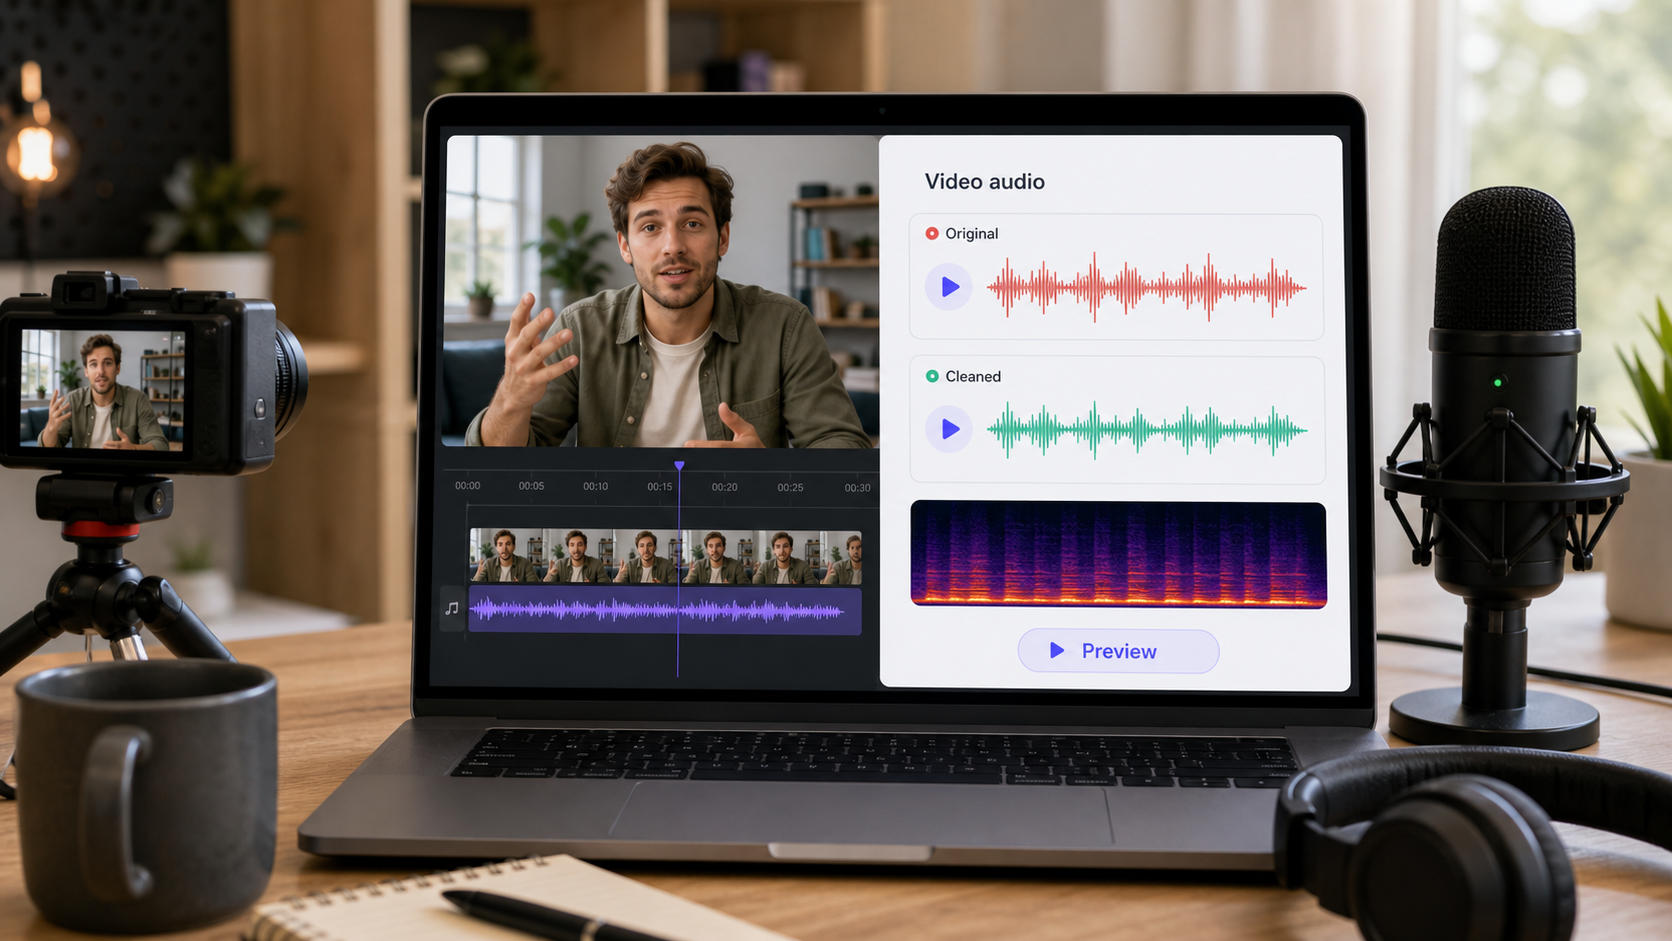
The practical workflow is simpler than it sounds. Clean the dialogue before music and heavy editing, identify the dominant problem, apply the lightest fix that matches it, then judge the result during active speech instead of in silence. If you mainly need a quick publishability decision, CleanAudio's video cleanup workflow is useful when the words are still understandable and the background is the main distraction. If the speaker is too far from the mic, the room is washing over every sentence, or wind and clipping cover key words, cleanup may still help, but it should not be framed as a guaranteed rescue.
For nearby context, see background noise removal, types of background noise in recordings, how to remove background noise from a microphone, and how to remove room noise from a recording.
Why Generic Video Audio Advice Fails
Video audio problems are not all the same recording problem wearing different thumbnails.
- Vlog audio is often captured on a camera, phone, or compact wireless setup in changing locations.
- Interview audio often fails because one speaker is fine while the room, table, second mic, or wider camera position makes the other track worse.
- Tutorial audio often looks easy because the room is quiet, but keyboard clicks, HVAC, desk vibration, and distant webcam mics still make speech feel cheap.
That difference matters because the recovery path changes with the capture path. Shure's critical-distance guidance is useful here: once the microphone gets too far from the talker relative to the room, the direct speech and ambient sound start arriving at more similar levels [1]. DPA's acoustics and speech-intelligibility guidance explain the same problem from another angle: reflections and background noise reduce clarity because they compete with the consonant detail that makes speech easy to follow [2][3].
So the first job is not remove noise. The first job is decide what kind of damage you have.
Scene Diagnosis Checklist
Use this checklist before touching a repair control.
Vlogs
- Listen for wind rumble, street wash, HVAC, and camera-handling noise.
- Check whether the voice stays forward when the speaker turns their head.
- If the background changes every few seconds, expect segment-based cleanup rather than one global setting.
Interviews
- Compare each speaker separately before you judge the whole clip.
- Check for room reflections, table bumps, clothing rustle, and distance mismatch between microphones.
- If one track is clean and the other is distant, do not expect one chain to fit both speakers equally well.
Tutorials
- Check the first sentence, the keyboard-heavy section, and one quiet pause.
- Listen for fan noise, room wash from a webcam mic, mouse clicks, and desk vibration.
- If the narration is clear but the background is steady, this is usually one of the cleaner repair cases.
Stop Conditions
- If consonants become papery, watery, or hollow, back off.
- If the voice sounds quieter but not clearer, the tool is treating symptoms instead of solving the main problem.
- If the file is clipped, overloaded, or covered by another voice, cleanup becomes damage control, not routine polishing.
The Workflow Order That Usually Holds Up
The highest-value decision is to clean early, before the timeline gets crowded with music, transitions, captions, and loudness work.
- Duplicate the original clip or sequence so the raw audio stays available for comparison.
- Solo the dialogue or voice-first clip before judging any repair move.
- Listen to three checkpoints: the first full sentence, the worst noisy moment, and a short quiet gap.
- Decide whether the problem is mostly steady noise, low rumble, room reflections, distance from the mic, or local interruptions.
- Apply the lightest repair that matches the dominant problem.
- Recheck active speech, especially S, T, K, and phrase endings.
- Only after the spoken line feels more intelligible should you move on to music, compression, and export polishing.
This order is not busywork. Adobe's current Premiere documentation treats dialogue repair as part of the editing workflow itself, with controls for reducing noise, hum, and related distractions inside the Essential Sound panel [4][5]. Adobe's Audition restoration documentation makes the tradeoff explicit: the right amount of reduction depends on the noise type and on how much loss in the remaining signal is acceptable [6]. In practice, that means the workflow should bias toward lighter decisions that survive real speech, not only cleaner-looking silence.
Match the Fix to the Problem
If the problem is steady background noise
This is the best case for routine cleanup. A stable air conditioner, fan, computer wash, or constant room floor can often be reduced without rebuilding the whole track. Premiere's dialogue repair tools are a reasonable first pass for mild cases [4][5]. If the noise is more obvious or the clip matters more, a dedicated cleanup workflow gives you a cleaner before-and-after judgment [6].
If the problem is low rumble
Rumble behaves differently from broadband hiss. It may come from handling noise, camera support, HVAC, traffic, or outdoor movement. Treat it as a low-frequency issue first, then decide whether broader cleanup is still needed. If you denoise the whole file before addressing the low-end buildup, you often remove more voice than necessary.
If the problem is room wash or light reverb
Room sound is not just background. It is part of the voice arriving late. DPA's acoustics guidance is useful here because it ties intelligibility directly to the room and its reflections [2][3]. Your goal is usually not to make the speaker sound like they recorded in a booth. The goal is to shorten the smear enough that words become easier to follow.
If the problem is distance from the microphone
This is where many cleanup attempts disappoint. Once the room and the voice are captured at nearly the same level, the software has less intact speech to preserve. Shure's guidance on critical distance explains why the direct voice matters so much before post ever begins [1]. Cleanup may still improve the clip, but it should be framed as rescue, not restoration.
If the problem is intermittent events
Keyboard hits, cup taps, clothing rub, chair squeaks, coughs, and one bad bump are poor candidates for one global setting. These usually need local edits or selective repair. If you use a global denoise pass to solve a local interruption, you often damage the whole clip to fix one second.
A Fast Path for Vlogs, Interviews, and Tutorials
If you do not need a deep editor chain and mainly need to decide whether the clip is publishable, use a preview-first path.
- Start with the original video file, not a heavily processed export.
- Run a cleanup preview.
- Compare one clean sentence, one problem section, and one quiet pause.
- Keep the cleaned version only if the words become easier to follow and the voice still sounds human.
That is where CleanAudio fits well.
- For vlogs, it is useful when the speech is close enough to survive and the background is changing just enough to make manual settings annoying.
- For interviews, it is useful when you need to judge whether a guest answer is good enough before rebuilding the whole segment.
- For tutorials, it is useful when the real question is whether the narration already sounds professional enough once the steady distractions are lowered.
The important boundary is still the same: if the words are buried, clipped, or missing, a preview workflow can reveal the limit quickly, but it should not be sold as a magic recovery stage.
When Built-In Editor Tools Are Enough
Built-in editor tools are usually enough when:
- the noise is mild
- the clip is short
- the voice is already fairly close and intelligible
- the problem is mostly steady noise or light rumble
- you need to stay inside the active edit timeline
That is the practical role of Premiere's dialogue repair controls [4][5]. They are fast and convenient. They are not proof that every hard case should stay inside the timeline.
When a Dedicated Cleanup Workflow Is Safer
Move to a dedicated cleanup workflow when:
- the background changes a lot across the clip
- one speaker is much worse than another
- room wash or low rumble is still distracting after the first editor pass
- the editor cleanup starts making the voice metallic, watery, or hollow
- you want to make the keep or retake decision before the project gets deeper into finishing work
This is usually the better path for creator footage that is almost usable but not confidently publishable yet.
Common Mistakes That Make Video Audio Worse
- Cleaning after music and loudness processing instead of before.
- Judging quality only in silent gaps.
- Using the same settings on every speaker in an interview.
- Treating room reflections like steady hiss.
- Pushing harder every time a little noise remains.
- Confusing a cleaner waveform with clearer speech.
Each one moves attention away from the real question: can the listener follow the message more easily now than before?
Prevention Changes the Next Shoot More Than a Stronger Plugin
The best cleanup workflow still starts before recording.
- Keep the microphone meaningfully closer to the speaker than the room [1].
- Reduce reflective surfaces or move away from the worst ones when recording speech-heavy video [2][3].
- For interviews, monitor both speakers separately before the real take.
- For tutorials, test the exact desk, keyboard, and fan setup you will actually use.
- For vlogs, treat handling noise, wind, and traffic as capture problems first, not only post problems.
These are small operational choices, but they change whether cleanup feels like polishing or rescue.
FAQ
Should I clean video audio before editing the full timeline?
Usually yes. Clean early enough that you can judge speech clearly before music, transitions, and export processing complicate the decision.
Are built-in video editor repair tools enough?
Often yes for mild steady noise, hum, or rumble. They are less reliable when the clip has changing background noise, stronger room wash, or one speaker who is much worse than another [4][5][6].
What is the biggest sign that I should stop processing?
Stop when the voice starts sounding thinner, more watery, or less believable even if the background is lower. The success condition is clearer speech, not the quietest pause.
When is a retake smarter than more cleanup?
A retake is usually smarter when the speaker is too far from the mic, the room is overwhelming the direct voice, the clip is clipped, or important words disappear under wind, traffic, or another person.
Sources and Further Reading
[1] Shure: Critical Distance and Microphone Placement
https://service.shure.com/Service/s/article/critical-distance-and-microphone-placement
[2] DPA Microphones: 10 important facts about acoustics for microphone users
https://www.dpamicrophones.com/mic-university/background-knowledge/10-important-facts-about-acoustics-for-microphone-users/
[3] DPA Microphones: Facts about speech intelligibility
https://www.dpamicrophones.com/mic-university/background-knowledge/facts-about-speech-intelligibility/
[4] Adobe Premiere Help: Audio editing with Essential Sound panel
https://helpx.adobe.com/premiere/desktop/add-audio-effects/adjust-volume-and-levels/audio-editing-with-essential-sound-panel.html
[5] Adobe Premiere Help: Repair dialogue in Premiere
https://helpx.adobe.com/premiere/desktop/add-audio-effects/adjust-volume-and-levels/repair-dialogue.html
[6] Adobe Audition Help: Reduce noise and restore audio
https://helpx.adobe.com/audition/desktop/effects-reference/noise-reduction-restoration-effects.html